
Free Cross Stitch Chart Maker
Start with a blank grid and draw your own counted cross-stitch design. Choose DMC colors, keep a base template to reuse, and export each finished design as a printable chart with a floss key.
Free to create and export · No account needed · Browser-based editor
Choose your starting point
Planning a personal project? Compare drawing, photo conversion, and editable samples in the create your own cross stitch pattern guide.
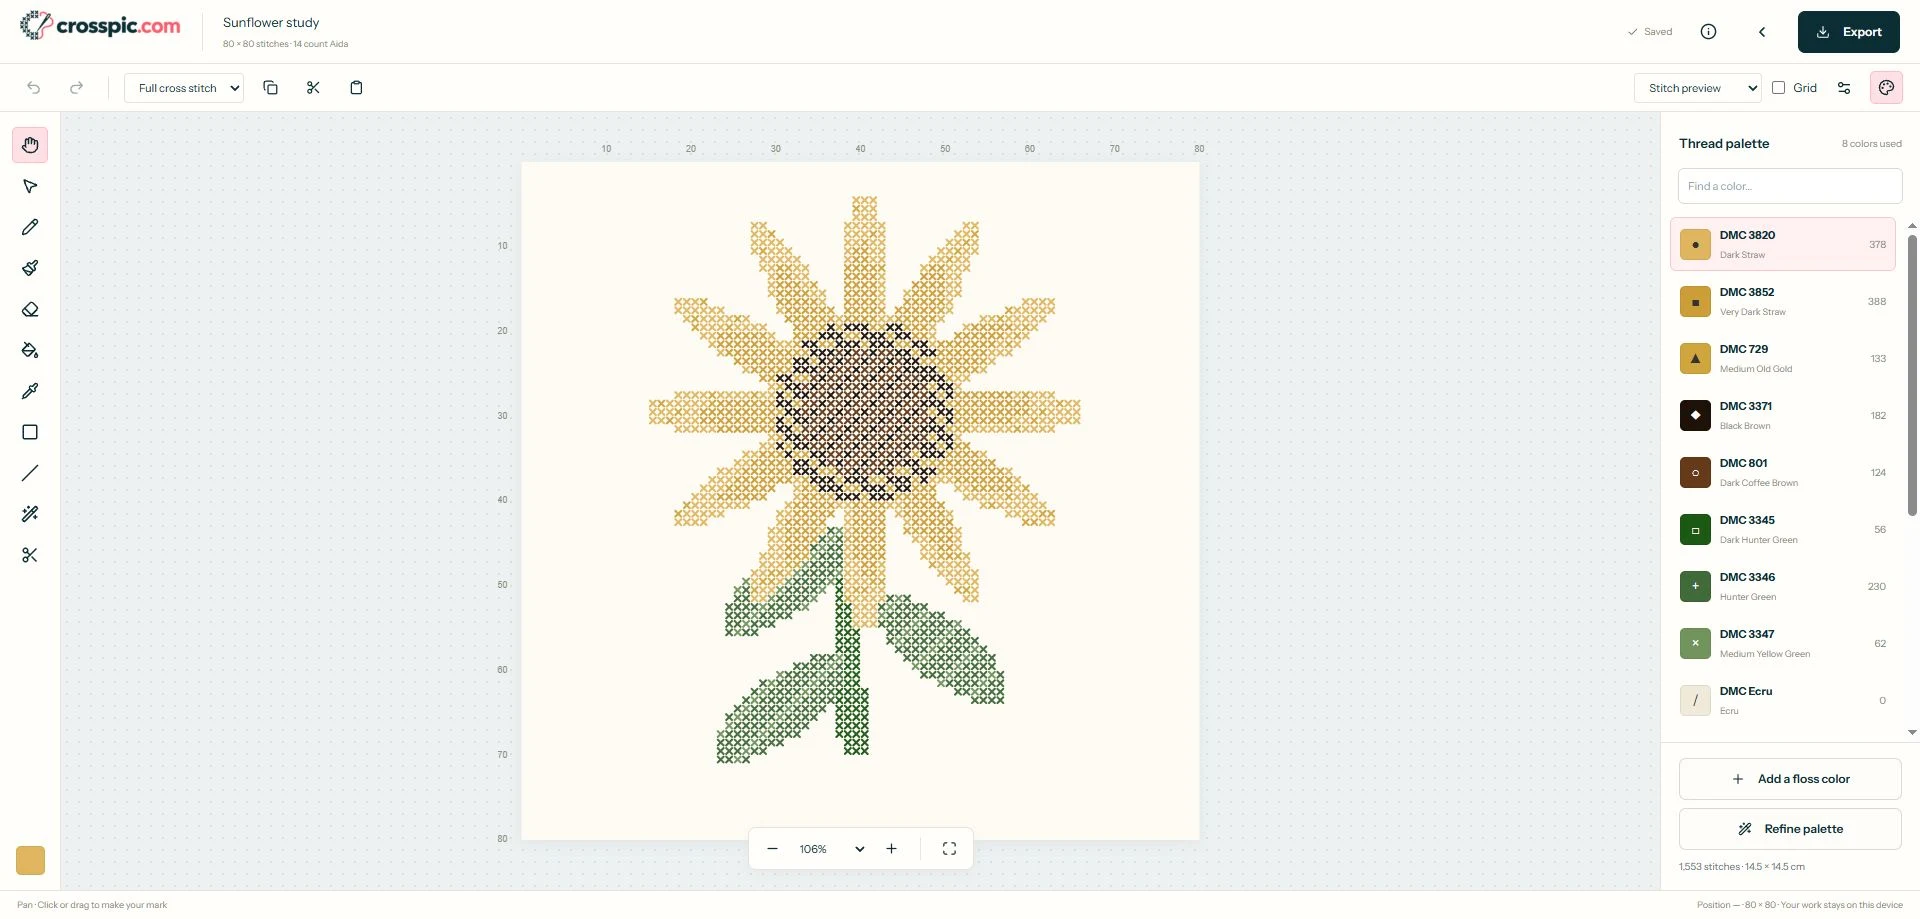
For a blank cross stitch template, set up an empty grid and draw directly on it. To adapt an existing design, open the editable sunflower sample. If you want a finished chart to stitch, browse free patterns and PDF downloads instead.
For names and sampler lettering, the text generator places block letters directly on a stitch grid. Open the result in the editor to add your own border or motif.
To inspect a manageable real chart first, open the 40 × 40 geometric initial example. Its editable project has 438 occupied stitches and three thread colors; the remaining grid cells are unstitched.
Make a reusable cross stitch template
A shared border or layout can be the starting point for several designs. For example, draw a border on a 30 by 30 grid and leave the middle empty for a different small motif in each version.
Create your base
Choose the stitch dimensions and fabric count, draw the parts you want to keep, and name the project so you can recognize it, such as “Small border base.” Keep the center clear until you are ready to make a variation.
Duplicate before editing
Return to My patterns and choose Duplicate on your base pattern. Use Rename on the copy, then open it to draw a new motif or change its palette. Your base remains available for the next design.
Keep an editable backup
Use Export project to download a
.crosspicfile of the base and any versions you want to keep. Restore a file with Open project in My patterns. Export a separate PDF when a design is ready to stitch.
How to make your own cross-stitch chart
Set up the grid
Create a blank pattern, name it, and choose its width, height, and fabric count. Try a 30 × 30 grid for a small motif while you learn the controls.
Draw and refine
Choose a DMC shade and draw with the pencil or brush. Fill areas, erase mistakes, and use selection to copy parts of the design. Start with a few colors and full crosses.
Check and export
Switch to symbols or colors + symbols to inspect the chart. Export a printable PDF, then save a separate
.crosspicbackup for future edits.
Choose stitch dimensions before drawing
Grid dimensions describe stitch positions, not inches. A 70 × 70 chart stitched over one square on 14-count Aida measures 5 × 5 inches (12.7 × 12.7 cm). Add fabric margins separately for finishing.
The blank pattern creator shows finished size for your chosen fabric count and accepts grids up to 500 × 500 stitches. A small grid helps you judge whether a shape reads clearly before committing to a larger design.
Edit stitches and outlines
Use the pencil for individual cells, fill for larger areas, and the eyedropper to reuse a color already on the grid. Undo and redo let you compare changes as you work.
Add fractional stitches or draw backstitch between grid corners when a detail needs them. The tool and shortcut guide explains the controls; the first-pattern walkthrough starts with a simple blank canvas.
Build a practical DMC palette
Choose thread colors from the DMC palette. Replace a shade or merge similar colors to reduce thread changes, and check isolated stitches before removing them.
Screen colors are a guide, so compare physical floss for color-sensitive work. Follow the palette cleanup guide to simplify a busy design.
Make the chart readable on paper
Export PDF charts in color, symbols, or both. Adjust stitches per page, grid numbering, and page overlap, then inspect the preview and floss key. Print a test page to check symbol size.
PNG export provides a design image; a .crosspic file preserves the editable project. See the printing guide and chart-reading guide.
Starting with an image instead?
If you already have a photo or illustration, use the photo to cross-stitch pattern workflow to convert it before editing. For drawing from scratch, start with a blank chart or try the editable sample above. Open your pattern library to return to projects saved in this browser.
Template and chart maker questions
What is a cross stitch template?
Here, a template is an editable starting pattern: a blank grid, a border, or a base motif you can reuse. Draw your base once, then duplicate it in your pattern library for each new design. A finished PDF chart is for stitching; a .crosspic project file keeps the design editable.
How do I reuse a template without changing the original?
Return to My patterns and choose Duplicate on the base pattern. Rename the copy before opening it, then edit that version. Export the original as a .crosspic backup too; browser storage is not a permanent backup.
Can I make a chart without a photo?
Yes. Create a blank pattern, choose its width and height in stitches and fabric count, then draw directly on the grid. Blank patterns support up to 500 by 500 stitches.
Is the chart maker free?
Yes. Creating patterns, editing stitches, and exporting PDF, PNG, and editable project files are free. No account is required.
Can I use stitches other than full crosses?
Yes. The editor supports half, quarter, three-quarter, and petite stitches, French knots, and backstitch. Fractional stitches use fixed orientations; independently colored layered quadrants in one cell are not supported.
Can I print a chart with symbols?
Yes. Export a PDF with symbol, color, or combined charts and a floss key. Adjust the page layout and check the preview before printing.
Where are my charts saved?
Projects are saved in the current browser, without automatic device synchronization. Export a .crosspic backup to keep an editable copy or move it to another device. Clearing browser data can remove saved projects.
Put your first stitches on the grid.
Choose a small canvas, pick a few colors, and draw your own motif.
Create my chart